 Wishlist
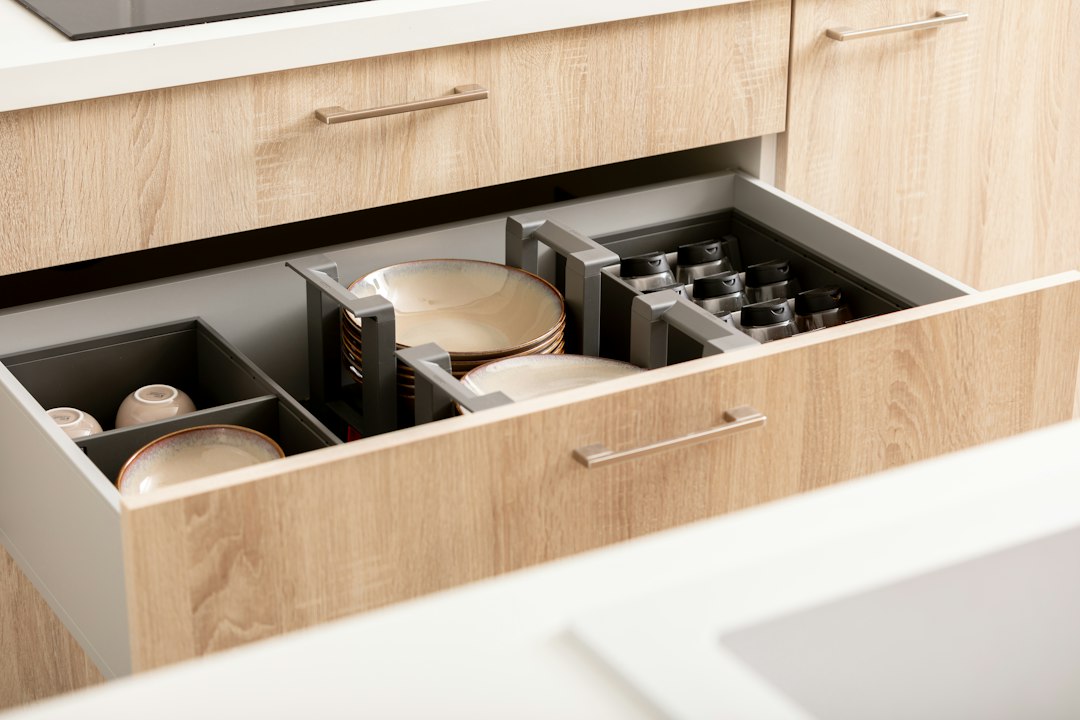
Top takeaway: organize deep kitchen drawers by how you use them, not by forcing standard flat inserts
The best way to organize deep kitchen drawers is to first measure and decide primary use (everyday utensils, pots and lids, bakeware, or bulk items), then choose systems that match that use: shallow dividers for flat tools, stackable trays or risers for tall utensils, and vertical racks or inserts for large pans. Matching layout to function prevents wasted space, constant re-sorting, and jammed drawers.
What actually matters before you buy anything
Three facts determine success: accurate dimensions, how you access items, and what you store.
- Measure precisely: interior width, depth (front-to-back) and especially height from drawer bottom to underside of cabinet or drawer top. Many “deep” drawers vary—some are only 3–4" taller; others are 6" or more.
- Decide access patterns: do you open the drawer for quick grab-and-go (utensils, daily tools) or for occasional retrieval (specialty bakeware)? Items you use frequently should be front and visible.
- Inventory what fits best: tall spatulas, ladles and rolling pins need vertical clearance; nested pots and lids want horizontal zones or a lid rack; baking sheets are easiest stored vertically.
Match storage style to use case
Organizing choices split by primary drawer roles. Pick the role that most closely matches your drawer and build from there.
Everyday utensils and cutlery (fast access)
If the drawer holds forks, spoons, kitchen scissors, peelers and a few larger spatulas, aim for layered shallow organization.
- Use tiered or stacked trays to keep cutlery front and small tools behind—this takes advantage of depth without burying items.
- Low-profile bamboo or plastic trays work when drawer height is limited; if you have more height, a shallow tray plus a deeper removable caddy gives mobile portability to counters.
Large cooking tools and tall utensils
Tall tools (whisks, ladles, tongs) need vertical thinking.
- Stackable vertical trays or risers create separate levels so tall items stand upright without flopping over.
- An alternative is a narrow upright divider section, letting tall utensils sit handle-up at the back while short items live at the front.
Pots, pans and lids
Deep drawers are ideal for cookware—done right they beat crowded cabinets.
- Use a pan organizer or adjustable vertical rack to stand lids and flat pans on edge for visibility. This keeps them from sliding and scratching.
- For nested pots, designate a front section for the workhorses and a rear area for occasional larger stockpots; place lids in a separate divider so you can grab a lid without shifting pots.
Baking sheets, cutting boards and trays
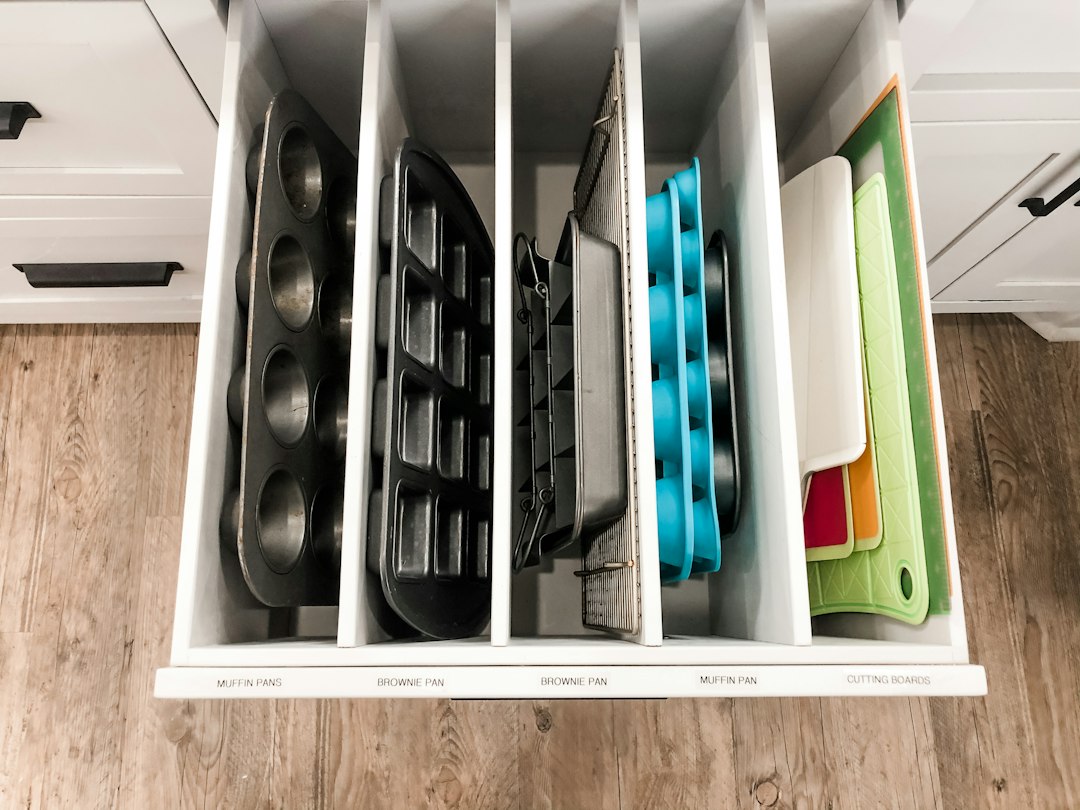
Thin, long items are best stored vertically.
- Install narrow vertical dividers or use an adjustable pan organizer to keep sheets upright and separated—this reduces the need to lift stacks to access the bottom item.
- If the drawer is very deep front-to-back, position these vertically at the back and place frequently used items up front.
Bulk items, small appliances, and overflow
Deep drawers often become the “catch-all.” Avoid that by creating zones.
- Reserve one side for bulky single items (immersion blender, slow cooker lid) and another for organized small containers (cling film, foil, zip bags) using compartments.
- Use removable bins so you can pull the whole bin out when you need to access items at the bottom.
Which organizer types actually work for deep drawers
Not all inserts are made equal—choose based on the use cases above.
Expandable bamboo/plastic dividers
Good for general utensil separation and flexible widths. Best where height is moderate and you want a tidy look. Bamboo is sturdy and visually pleasing; plastic molds are easier to clean.
Stackable or tiered trays (great for mixed tool drawers)
These create layers and make everything visible. Ideal when you need to keep small flat items and tall utensils together.
Vertical racks and pan organizers
Designed for cookware and baking sheets. They transform a deep drawer into a mini-pegboard—best where you want to see and grab one pan without unstacking.
Removable bins and caddies
Use for bulk or mobile needs (picnic cutlery, baking kit). If you frequently clear counters, a removable caddy is worth the space trade.
Measurement and fit checklist before ordering
Measure, measure, measure. Most products list overall width and height—match those to your internal drawer dimensions and leave clearance for slides.
Product recommendation for common needs
When one high-quality organizer solves the core problem, pick it. For a large deep drawer that needs flexible zones for utensils, trays and tools, the highest-ranked match in our catalog is a strong choice.
Quick layout planning: three practical examples
Use these templates to mock up your drawer before buying.
- Utensils-first drawer: shallow tray at front for forks/spoons, tiered tray mid-drawer for knives and tools, tall utensil zone at back.
- Cookware drawer: vertical pan organizer at one side, front row for daily frying pan, dedicated lid divider in the middle.
- Bakeware and trays: divide into vertical slots for sheets at the back, shallow bins at front for measuring cups, rolling pin and parchment.
Maintenance habits that keep deep drawers working
Set a simple routine: once a month, empty the drawer, clean the interior, and return items grouped by use. Label underside of removable bins if you share kitchen duties so everyone returns items correctly.
When to consider a small remodel
If drawer height is too shallow for needed organizers or sliders block vertical storage, consider swapping drawer fronts for a taller drawer or converting an under-counter cabinet into a deep pull-out. These changes cost more but can pay back with vastly improved function.

- Measure internal width, depth, and height and note slide clearance.
- Decide the drawer’s primary role (utensils, cookware, bakeware, or bulk storage).
- Mock up zones with cardboard before buying inserts.
- Choose organizers that match item height—vertical racks for pans, stackable trays for utensils.
- Pick at least one removable bin for bulky or frequently transported items.
- Schedule a monthly clean-and-regroup to prevent drift into a catch-all.
Organize deep kitchen drawers by defining the drawer’s main role, measuring carefully, and choosing inserts that match item height and access patterns. A single versatile organizer (like an expandable tray or stackable system) can often solve most problems—measure first and plan zones to avoid wasted space.
How deep does a drawer need to be for stackable trays?
Stackable trays usually need at least 4–5 inches of internal height to be useful; measure the drawer height and the trays’ combined height before buying.
Can I store pots flat in a deep drawer?
Yes, but flat stacks are hard to access; use a vertical pan organizer or dedicate one side to nested pots and the other to lids to avoid shifting.
Are bamboo organizers better than plastic?
Bamboo looks nicer and is sturdy, but plastic is easier to clean and often slimmer—choose based on visibility and cleaning needs.
What’s the easiest upgrade without buying inserts?
Use shallow removable bins or repurpose small storage baskets to create zones; cardboard templates help plan before purchase.